To be clear, this garden is new to me. The previous owner was an avid gardener but he had to quit tending to it sometime during the summer. My girlfriend and I bought a new home in north, central North Carolina in early fall. Since there were many other pressing projects, I didn’t have time to deal with it until mid-November.
What’s really nice is not having to completely start from scratch. I’m starting with:
- Three cubic-yard sized compost bins
- Bin 1 was full
- Bin 2 was half-full
- Bin 3 was empty
- A compost roller
- A small greenhouse (about 10×12) in need of minor repairs
- Four 8 x 8 foot raised planting beds
- One planting area with herbs
- A few potted herbs (mostly mint)
- Three self-watering planters
- A bunch of gardening tools
To say I’m excited about this is quite the understatement. While my daughter was visiting, we went out to assess the state of the garden. It was quite a nice surprise to discover some vegetables ready to harvest!
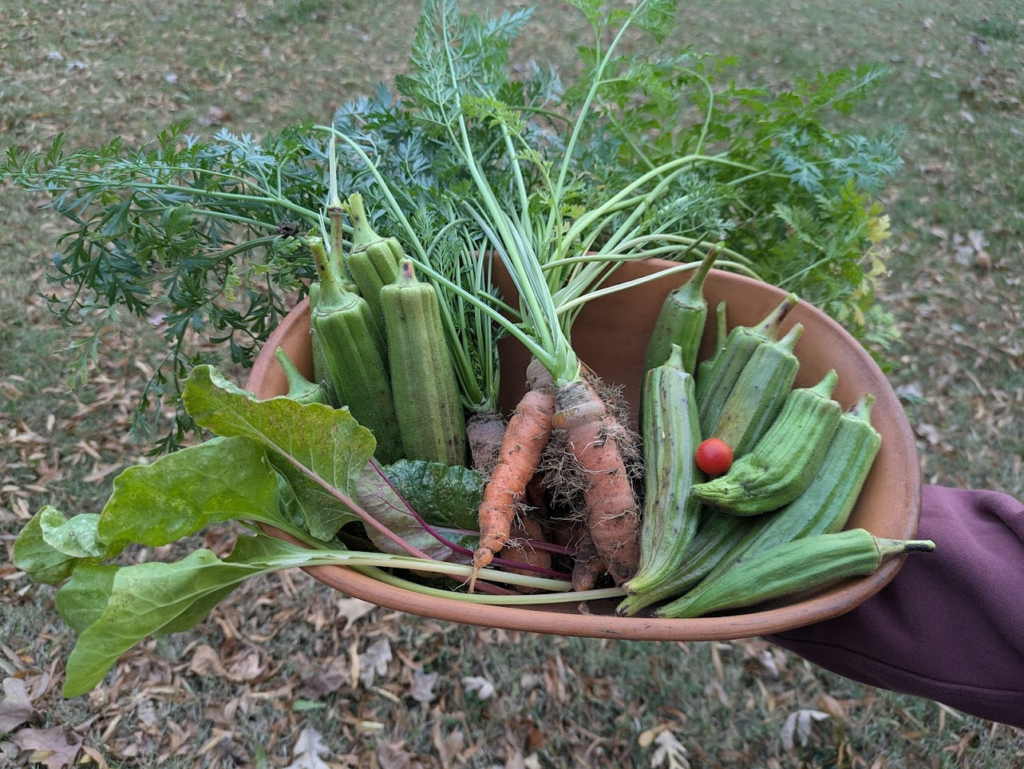
Sadly, the okra was too fibrous to eat. the carrots, greens and lone tomato, however, were delicious!
Fast forwarding a few weeks, I thought it would make sense to start getting things ready for planting. I cleared the beds and restarted the composting. I’ll be honest, I’m a novice so I fired up an AI chat session and asked it a few questions. I’ll paraphrase the advice.
- I live in zone 8B. I have a compost roller and a 3 bin compost container. I have never composted. It’s currently December. How do I get composting going so it’s ready for spring planting?
Have at least one batch of compost maturing in the 3-bin system and an actively cooking batch in the roller to finish quickly.
The compost roller will be the “hot batch” with finely chopped greens (kitchen scraps and green plant matter), browns (I stuck with the abundant fallen leaves in the yard), coffee grounds (plenty available), and a small amount of compost from the full bin to start it off. Add finely chopped scraps and leaves (1:3 ratio) and turn 3-4 times per week. It should be ready by March or April.
The bins are the long-term, continuous compost. I started this with the woodier greens, the end-of-life plants from the raised beds, and cuttings from trimming back other greenery. Bin 1 is my active pile. Bin 2 is the cooking pile. Bin 3 is mostly finished and will be used in the spring. From the garden, I chopped up the okra stalks, bean stalks, and a few tomato plants. Brown was more leaves and a small amount of pine needles.
I’m avoiding cardboard as brown because I want to keep this as organic as possible and I’m wary of any chemicals from shipping boxes. - Identify these beans.

These look like dried bean pods, and based on their shape, color pattern, and the white seeds inside, they are most likely dried runner bean (Phaseolus coccineus) pods that has matured and dried on the plant. - Can these beans be used to seed a garden?
Runner beans (which yours appear to be) are usually open-pollinated, so saving seed is common and works well. Runner bean seeds are hardy and typically have high germination rates if fully dried. Even seeds a year old often germinate >70%. If you’d like, you can show me the seeds outside the pod in a close-up and I can confirm their condition/viability even better.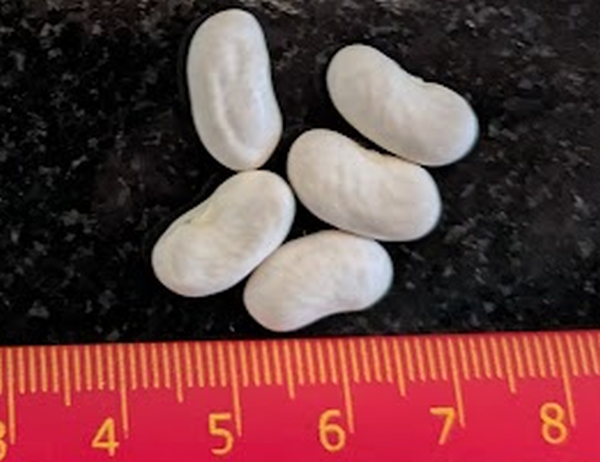
These seeds look healthy and fully viable. These are perfectly suitable to plant in the garden next season. Your seeds look like they should germinate 80–95%. Keep them in a paper envelope or breathable container. Store in a cool, dry, dark place.
Cool. So I harvested them.
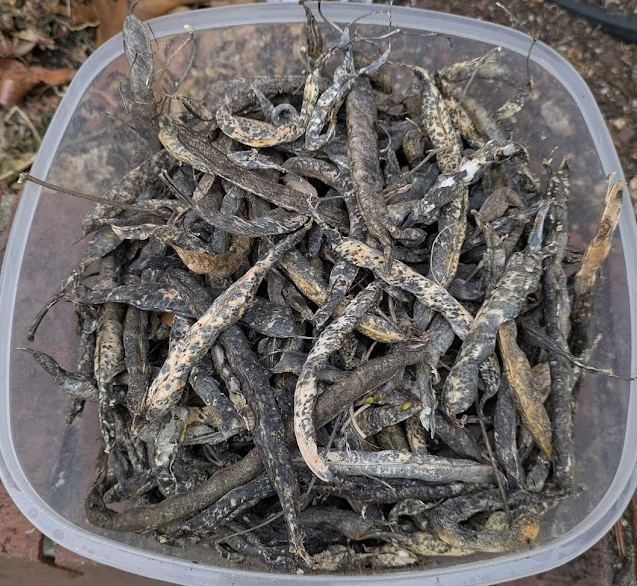
Then I shucked them.
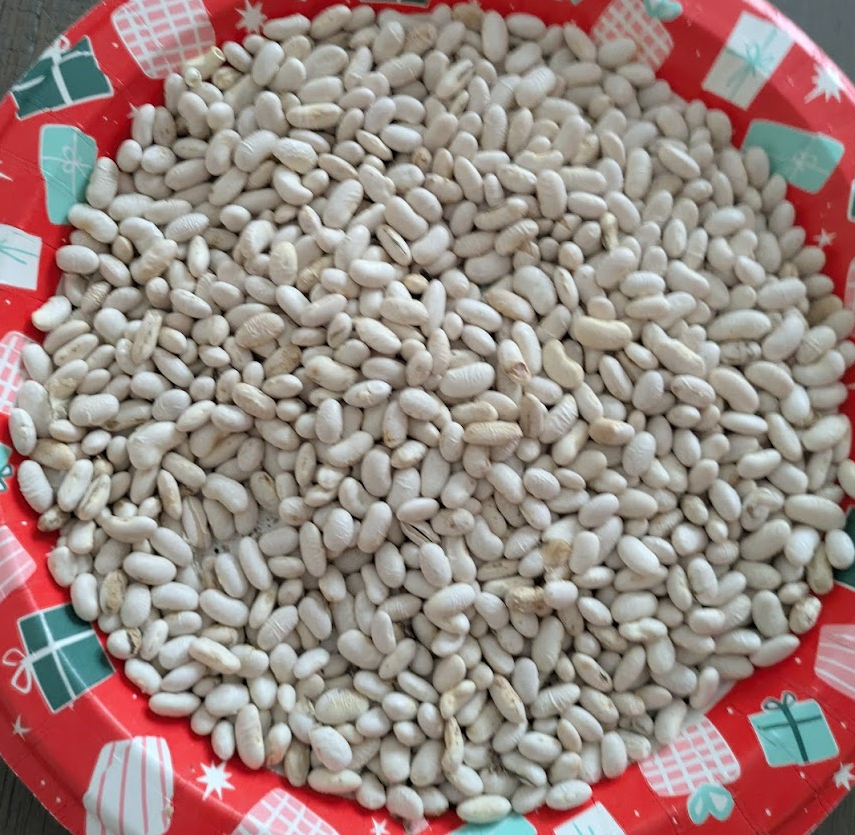
I have high hopes for my beans! I think I have enough to trade for other seeds if I can find a seed swap somewhere nearby. I might need to hook up with some preppers!